Last updated on Dec. 24th, 2021, | By WayKen
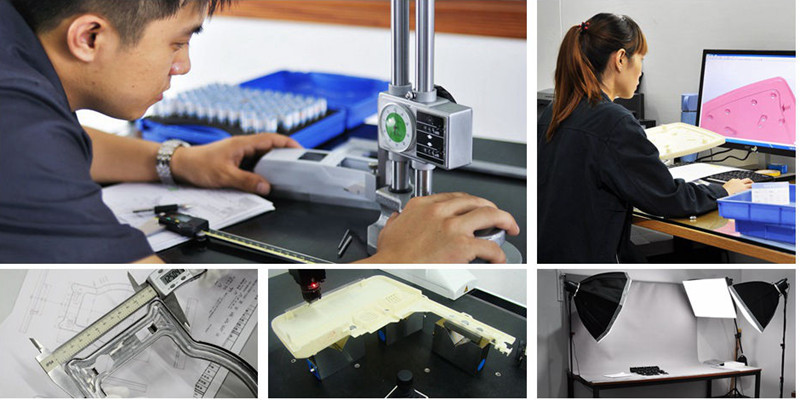
Modern Industry is characterized by the precision of the manufactured elements. It is already evaluated in the tenths of microns and continues to grow incessantly. Actually, the precision of the machine tools that are stated by the manufacturer has grown so much that it becomes harder and harder to measure the actual deviation of the manufactured part. So, new ways of control and metrology equipment are being constantly developed and improved. One of the flexible, fast, and precise equipment units for estimating part precision is the Coordinate Measuring Machine.
How Does the Coordinate Measuring Machine (CMM) Work
A machine utilizes an extremely sensitive electronic probe to analyze a sequel of discrete points from the geometry of a production part. This testing is used to calculate the part’s conformance to specific requirements.
CMM is frequently used to evaluate a part of its assembly to determine whether or not it respects the original specimen design. These are integrated within quality testing or quality control workflows to analyze the dimensions of manufactured parts to prevent any possible quality issues.
The working procedure of coordinate measuring machines (CMM) includes two things. It measures by the manual geometry of an object, and magnitudes of the object by touching the probe ascended on the moving axis of the machine. It also assures the parts to ascertain that is the same as the corrected design. It operates through the following steps.
The part to be analyzed is placed on the base of the CMM. The base is made of rigid and stable material and it’s basically the site of measurement. This stability of the base makes sure that measurement is accurate irrespective of external forces that can change the operation. All mounted above the CMM plate are allowed to move and are equipped with a touching probe. The coordinate measuring machine (CMM) controls the gantry in the next step to move the probe along the three-dimensional axis. By performing this step, every facet of the part is replicated in order to measure it.
When the probe touches the part to be measured, it sends an electrical impulse which is then mapped out by the computer. By repeating this step, with many parts you will outline the structure of the part.
After the measurement step, the next step is the analysis procedure, after the probe has detected the part’s X, Y, and Z coordinates. The data obtained is analyzed for the construction of features. The action mechanism is the same for all coordinate measuring machines (CMM) that use the camera system.
Components of a Coordinate Measuring Machine (CMM)
A Coordinate Measuring Machine (CMM) is composed of various parts. The portions to be analyzed are ascended on a solid slab, usually brought of granite, that is laid on a flat ground surface. The electronic probe which often comes in various sizes and categories clambers on a spring-loaded stylus. Also, this stylus is an attached gantry that stirs in a 3- dimensional X-Y-Z plane coordinate.
The stylus and probe are able to divert unaided in order to gain several part characteristics. By using a joystick, we can control all the actions of the gantry and investigation respectively. The components of the coordinate measuring machine (CMM) include:
- Probe
- Granite table
- Fixtures
- Dryers and Air Compressors
- Software
What is the Function of a Probe?
An investigation is one of the vastly essential parts of a coordinate measuring machine (CMM) as it makes biological contact, relatively than utilizing optical glint or lasers. One of its best features is that it doesn’t rely on circular stubs made from ruby or any other formal and stable substance that won’t alter its size expected to change in temperature.
The investigation and stylus are constructed to function collectively concurrently. They are related to exquisitely susceptible electronics that is capable of detecting the slightest deviation in electrical friction that come from the investigation.
When the globular tip touches the solid object, it is urged to avert and it produces an electrical indication which is apprehended in the computer. These amounts of points can be analyzed depending upon regulations of the substantial part.
Way To Be Utilized?
The main purpose of this point collection is a two-fold process. Particular points are utilized to analyze measurements of the real parts against a CAD customer’s list data for the goal of quality testing.
Or these collective degrees can be used to outline the silhouette of the portion by creating a “point cloud”. This technique is beneficial when only one specimen part is utilized as the base of a CAD program for outlining more parts, as done with the CNC machining.
The coordinate measuring machine (CMM) is extremely useful when computing points inside holes. These areas are not easy to assess with other optic systems because the glint tends to indicate and bounce to be around, causing imprecision in measurement due to the phenomenon of interference.
Granite Table
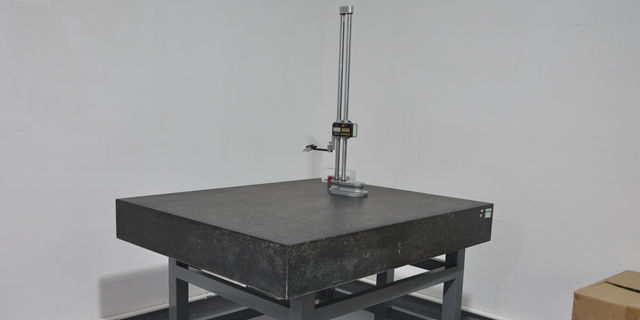
This is an essential component of the CMM machine because it is very rigid and hence stable. It is unaffected by temperature as compared to other elements. Its wear and tear rate is comparatively low. Granite is perfect for highly accurate measurement because it remains unaffected over time.
Fixtures
Fixtures are also very important tools used as agents of stability and support in most manufacturing functions. They are tools of coordinate measuring machines (CMM) and function in fixing the parts into their respective place. Part fixation is required since a moving part can lead to errors in calculation. Other fixing components available for use are the magnets, clamps, and fixture plates.
Dryers and Air Compressors
Air compressors and dryers are commonly used components of coordinate measuring machines (CMM) including gantry-type CMMs or standard bridges.
Software
Software is needed to analyze the probe and sensitivity of the other components.
Different Types of CMM
Bridge CMM
This type of coordinate measuring machine has a probing system that moves along the three-dimensional axes. In the coordinate plane, these axes are held orthogonal to each other respectively.
Each of the axes is equipped with sensors that monitor the position of the probe in micrometers while it moves and detects the points on the surface of the object. These points are collectively known as points cloud. These points illustrate the surface area of the object which users need to investigate.
Gantry CMM
Gantry CMMs are like bridge CMMs; however, they are usually much larger in size. Because these are built to remove the need to lift apart onto a table and offer similar accuracy levels. Gantry CMMs are used for very heavy or huge parts. These gantry CMMs must be mounted on a solid foundation, directly on the ground floor.
Cantilever CMM
A cantilever CMM is dissimilar to a bridge CMMs as the measuring head is only attached to one side of a rigid base of the CMM and so is different. Cantilever CMMs provide open access to inspection technicians on all three sides for ease of function.
The Multipurpose Application Of CMM in Contemporary Manufacturing
CMM is the most advanced modern means of automated and manual measurement, it has found a multitude of possible uses in the industry. A lot of different types of CMM make it possible for the tool to be used both on the large (gantry type CMM) and the smallest ( cantilever type CMM machines). A variety of probe types ( mechanical, optical, laser, or white light) ensures that you can measure even the surfaces that must not be touched by a probe or any other object. A high degree of CMM automation makes it possible to both use it manually by a machinist and to cut labor by automating it for repeated operations where large production volumes are concerned.
How to use a CMM Machine will depend upon the aims you want to achieve. The level of its flexibility and precision gives the manufacturers a lot of opportunities. You can use CMM after machining or measure the existing parts to redesign them, or you can use it as a part of an automated manufacturing chain. Here are many options and a number of them are listed in the following paragraphs.
What You Have to Do Before Using CMM
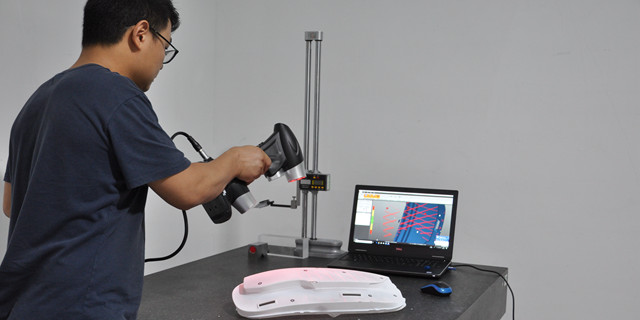
CMM machines are the most precise instruments to take measurements. They can estimate faults in the parts that are smaller than microns. However, for them to be as precise as they have been made to be, the machinist must thoroughly prepare the equipment to perform measurements. The level of preparation depends on the precision of the measured part. If we talk about the parts with the highest precision (the ones that have a tolerance of IT6 or even smaller) you will have to prepare both the CMM and the area where you are going to carry out the measurements. It must have a specific percentage of humidity and a temperature within the optimum and must be extremely clean since, at that precision, even tiny specks of dust affect the outcome of the operation.
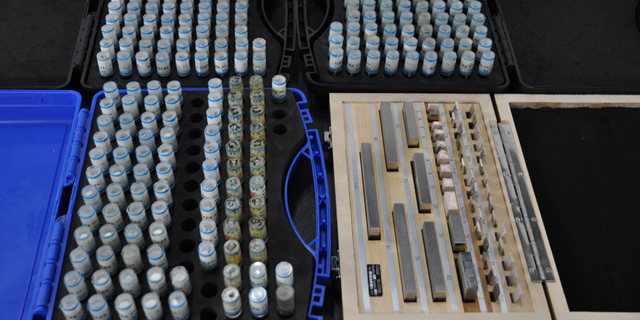
The CMM itself is usually calibrated by using an extremely precise metal sphere. Its size and form deviation are known to the highest degree. The position of the sphere on the granite working table is known as well ( usually there is a special fixture for it right in the center of the table). The probe must touch the sphere in a number of spots and determine the diameter and the form deviation of it. The measurements are then adjusted depending on their deviation and the sphere is measured again to ensure the correct setups have been saved.
CMM for Linear Surfaces Measurement
The simplest measurements include the tolerances of linear or cylindrical surfaces. In the majority of cases, those are measured by the machinist using a simple micrometer or a gauge right after he has finished machining. So, What is the point of using CM if a simpler tool can be successfully used for this kind of job?
The answer to that question is the automation of all the processes. All the modern industry concepts including the futuristic Industry 4.0 include a high degree of manufacturing processes automation where even the additional movements and tasks are done without the machinist. A good example of such a task is quality control. You can program the CMM to perform identical actions on any number of parts in a batch. However, you will need an automated fixture and an additional robot to load and unload the parts before and after the control.
CMM for Complex Surface Measurements
Coordinate Measuring machines’ main purpose is to measure complex surfaces. That is why when they are used for such parts as turbine blades, airplane wings, pump impellers, and other components with unusual surfaces, the CMM works to their full potential. The automation of such jobs is possible as well if you are making a large batch of identical parts and they are so precise that you must have every and each one of them checked. However, in the majority of cases, such parts are measured manually by the machinist.
In order to measure a complex surface, the machinist will move the probe along the three axes manually with a remote control until the probe touches the part where the machinist needs it to. Then, after a lot of measurements are taken, the points are analyzed and the profiles of the part are connected as splines. Then, the measurements are compared to a 3D model of the part ( including the acceptable deviations) or to some other data where the required sizes are shown.
CMM for Relationship and Form Deviations
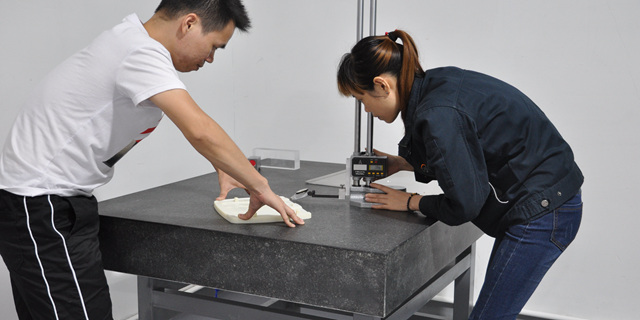
The majority of the high-quality parts are not only characterized by the error of their dimensions but by the precision of their surface forms and their position in relation to each other. Those deviations are especially important for revolving parts to decrease vibration and to ensure the smoothness of movement. CMM measuring for such deviations is not too different from the measurement of complex surfaces. All the form and relationship deviations have a base surface they are compared to. So, in order to achieve the precision requirements, you would have to clamp the part on the base surface and measure the required one. If we are talking about the relationship between two surfaces, just design the fixture to clamp the first surface and measure the second one.
CMM Measuring of Surface Finish
A profiler is the most widespread instrument for surface finish measuring. However, CMM machines can measure the surface finishes of the part as well because of their outstanding precision. However, you would have to change the probe to a special needle. The needle will then move along a surface and determine any kind of microscopic unevenness that the surface finish is formed from.
How WayKen Can Help You
At WayKen, we operate a quality system that has been certified by ISO 9001:2015 standards. If you want to get machined parts with more accurate sizes and shapes, please free feel to contact us in advance to discuss your parts measurement requirements. To learn more, you can upload CAD files and request a quote here.

