This section discusses the principles of the pad printing process under the following headings.
1. Stepwise Process of Pad Printing
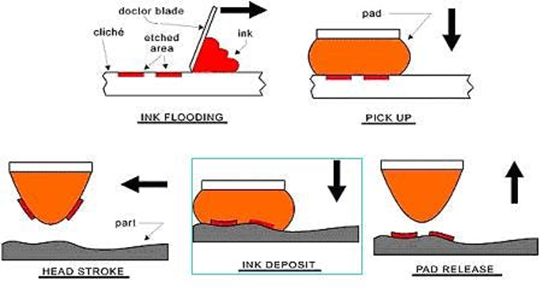
The printing plate used in pad printing undergoes a pre-process of etching depressions. The image for the print is etched on the surface of the flat plate using a laser or photoengraver. The depressed etching holds ink while a smooth silicon pad collects the ink from the plate and moves it to the designated object.
The following steps below illustrate the pad printing process using a closed-in cup printer:
Step 1: Home Position
This step involves placing the ink cup over the etched flat plate, concealing the etching. Then, the printing ink cup opens up and fills the etched area with ink.
Step 2: Exposure to Air
The ink cup removes surplus ink while it closes and leaves the etched plate. At this point, the printing plate remains bare while the etched part holds the deposited ink. The exposure of the ink to air causes its upper layer to be sticky, facilitating its easy adhesion to the silicone pad and workpiece.
Step 3: Printing
The silicone pad compresses the ink-filled plate to lift the image releasing the trapped air. The silicone pad with the lifted image then moves to the workpiece to apply it.
Step 4: Next Cycle
The ink cup returns to its home/initial position after the pads move the image. Then, it refills the printing plate, ensuring it is ready for the next print cycle.
2. Basic Components of Pad Printers
There are different setups, designs, and printing styles for pad printers. Nonetheless, they possess nearly similar components. Here are some of the standard parts of a pad printer:
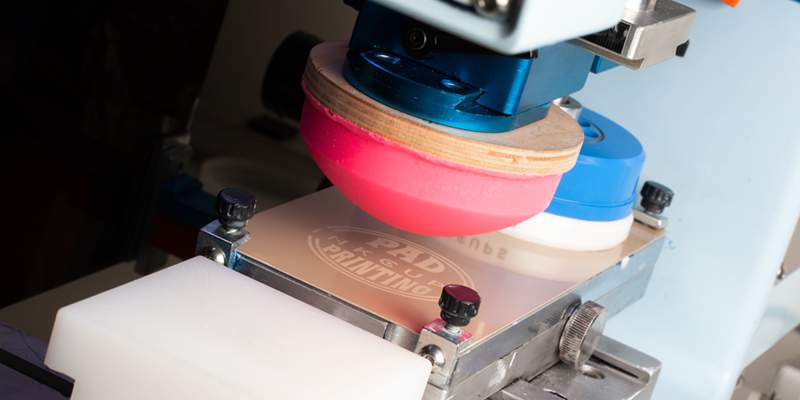
2.1 Pad Printer
There are three variants of pad printing machines: open inkwell, rotary gravure, and closed ink cup. These machines have different setups with varying printing styles. The open inkwell technology is highly versatile. It uses a spatula and floods the printing plate with ink.
The rotary gravure machine is similar to the open inkwell and well-suited for printing 360 º around a workpiece. The closed ink-cup technology uses the general technique of storing print ink in an inverted cup.
2.2 Pad Print Ink Cup
The pad print ink cup stores the ink and slides over the etched part doctoring the plate edge and leaving ink on it. This component has two constituents – the ring and the cup. The ring performs the doctoring while the cup houses the ink. Typical materials used for the ring are plastic, metal, or ceramic. Ceramics is the most used material of the listed materials. It doesn’t scratch the plate while doctoring and handles the printer’s consistent motion.
2.3 Pad Print Ink
This component is another crucial part of the pad printer. It consists of thinners, pigments, and resins. The thinner is responsible for the viscosity/tackiness of the ink. Pigment grants the ink different colors, while the resin/binder offers mechanical qualities such as resistance to scratch, adhesion, and abrasion.
Inks are of several series, each perfect for particular industries and objects. The typical standard of selection for ink includes wear resistance, light resistance, chemical resistance, coverage power, glossy or matte, and adhesion properties.
2.4 Printing Pad
The printing pad uses silicon to lift the ink from the flat printing plate to the workpiece. It transfers the image by pressing itself on the printing plate filled with ink and approaches the object, presses itself against it. The printing pad creates a high-quality print on a part because the silicon pad adapts to the shape of the part when moving the image to the object.
Silicon is the standard material used for making printing pads. However, depending on the application, printing pads often possess varying mechanical properties such as shapes, hardness, and sizes.
2.5 Pad Printing Plate
The pad printing plate is a vital component that holds onto the image that must be transferred to the object. The plastic-thin metal plates enclosed in photosensitive plastics are the standard printing plate. They are commonly applicable in small-to-medium productions and famous for their easy printing, cheapness, and flexibility. The steel plate is another printing plate type with good durability, toughness, and effectiveness for large production.
Screen printing is a unique process of transferring ink through a screen overlay/mesh and ink-blocking stencil. The material that receives the prints stays below the screen while forcing the ink through the stencil’s openings with a squeegee or roller.
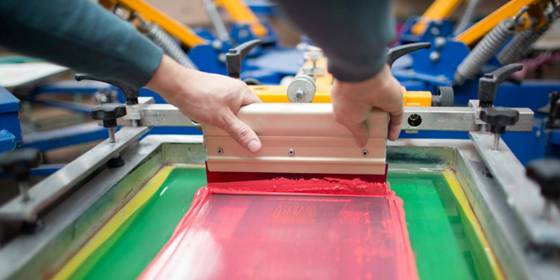
Screen printing is well-suited for printing on all kinds of material – paper, wood, metal, and especially fabric. Likewise, it has high compatibility with different colors allowing its great color saturation/consistency and opacity. Manufacturers often use this process in printing images on canvas bags and T-shirts. Screen printing is ideal for larger-scale printing projects because of the detailed and quality results it provides.
In contrast, pad printing is as effective as screen printing and provides brilliant results. It is suitable for printing fine details on small components with irregular shapes compared to screen printing, which works on flat surfaces. However, pad printing is a cost-effective option because it is easier to set up than screen printing.
Pros of Pad Printing
Here are some of the common advantages of pad printing:
- This technique allows using multiple colors to print images on highly chemical-resistant surfaces.
- Pad printers use a silicon pad, which easily adapts to surfaces with irregular shapes.
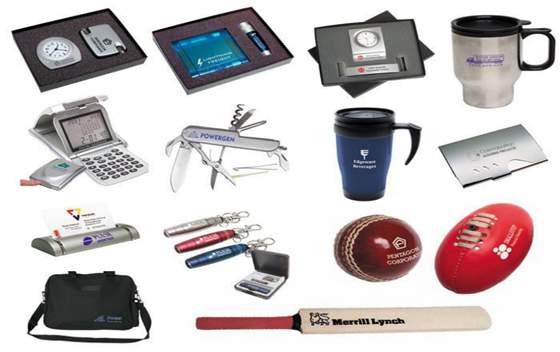
- The Pad printing process is ideal for personalizing or customizing products.
- Pad printing technology is compatible with various materials such as glass, metal, plastic, and edibles like sweets.
- It offers a crisp, high-quality finish on small, uneven, fragile objects such as minor electrical components.
- The Pad printing machine is easy to operate and cost-effective for the in-house pad printing process.
Cons of Pad Printing
Even with all the benefits pad printing offers, it has some drawbacks. Here are some of these disadvantages:
- Although it is suitable for printing small images on larger items, printing over a large area has limitations.
- The process is very slow and has more procedures than most printing methods.
- Some pad printers cause tonal inconsistencies when printing large blocks of color.
The silicon pad in pad printing is highly versatile and adapts to several irregular shapes giving the process an extensive range of applications in different industries.
Here are some of the sectors that use this process:
Cosmetics: This industry uses pad printing for high-quality decorative images and details on the surfaces of objects such as lipstick holders, cosmetic bottles, caps, and jars.
Automotive: The flexibility of the pad printing process allows manufacturers in this sector to efficiently decorate and label different automotive parts with images and details that are resistant to abrasion. Common pad printed parts include batteries and radiators.
Consumer Appliances: Pad printing is ideal for printing identification labels, instructions, branding, and decorating appliances such as telephones, keyboards, laptops, radios, and other gadgets.
Electronics: The pad printer helps to add attractive and easy-to-read brand images and details to electronic devices such as relays, cables, connectors, and others with complex shapes.
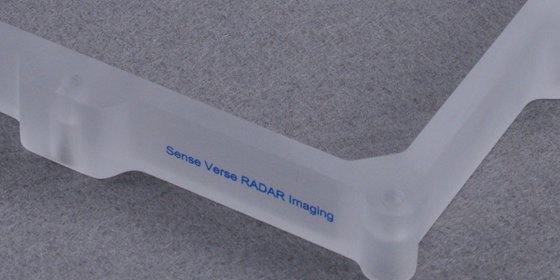
Medical: The medical sector accurately applies images on medical components with curvy, tiny, or wonky surfaces. It helps with easy identification and traceability. Common examples of pad-printed medical components include insulin pins, contact lenses, syringes, inhalers, tubing, implants, and catheters. Manufacturers often pad-print medical details with medical-grade inks to avoid toxicity.
Here are some factors to consider in pad printing to ensure a successful operation even though it is a straightforward process.
1. Choose High-quality Equipment
It would help if you always used high-quality equipment that facilitates high-quality printings. Even though there are three pad printers, the closed ink cup is the standard one. Also, you can consider automation as it enhances productivity and mitigate the risks of errors.
2. Mixing Ink
Mixing ink/color is a considerable alternative without the desired color. Partnering with the best pad printing services provider with the right experience, technology, and tool to determine the perfect color for your project gives you a better chance at mixing colors successfully.

3. Choose the Right Pad Type
Choosing the right pad type for your project influences the success of printing on parts. Generally, pads are of varying sizes, shapes, and mechanical properties, which you must consider before choosing the ideal one for your project.
- Larger pads have a minimal probability of distortion, minimizing deformation during printing.
- Hard pads provide sharper shapes and finer lines, perfect for hard and asymmetric surfaces.
- Steep pads that trap air allow easy air escape during lifting and transfer.
4. Avoid Excessive Pad Pressures
Applying excess pressure during printing can result in over-compression leading to split pads. Consider adjusting the downstroke of your printer, allowing the ink to work normally. Mechanical faults sometimes cause the application of excessive pad pressure during printing. Hence, it would help if you frequently inspected your machine for defects.