Aluminum Reflector Prototypes with High Optical and Aesthetics
WayKen helps customer process aluminum reflectors for headlights that combine functionality (optical surfaces) and aesthetics.
At a Glance of the Project
| Information | |
|---|---|
| Industry | Automotive |
| Product | Aluminium Reflector |
| Challenges | Complex optical details, surface accuracy of ±0.05mm |
| Technology | CNC milling, micro-milling, high polish |
| Material | Aluminium 7075 |
| Surface finish | Mirror-polished, surface roughness Ra0.05μm |
| Quantity | 6 Prototypes |
| Lead Time | 12 business days |
About the Customer and Product
The customers are from a company that specializes in the development of automotive components. They intend to make some headlight reflector assemblies for optical testing purposes. These headlight reflectors will be a component used for brake, turn, parking, and fog lights. After conducting a series of research, they found WayKen as their partner, who has rich experience in making optical components for headlights.
What are the Key Challenges to Making the Aluminum Reflector?
In the automotive industry, making aluminum reflectors is one of the most challenging tasks for carlight prototypes. It places high demands on the experience and capabilities of the prototype manufacturer. This is because the reflector needs both functionality (optical action) and appearance.
The product designers specifically wanted WayKen to pay full attention to the small details they were concerned about, which were the one of challenges in the project – the optical details (fine tooth shape).
Another processing challenge is the aluminum reflector needs to be machined as close as possible to the 3D model without leaving large radii and to scan the surface accuracy of ±0.05mm. At the same time, the final parts also need to be mirror-polished to achieve a 0.05um surface.
Taking a Close Look at the Reflector Design
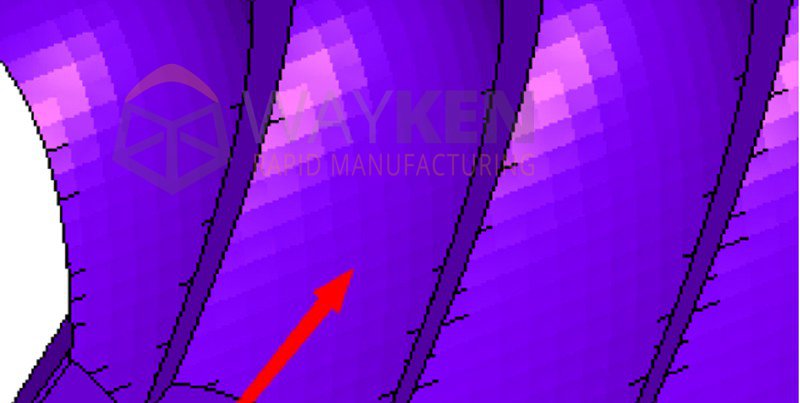
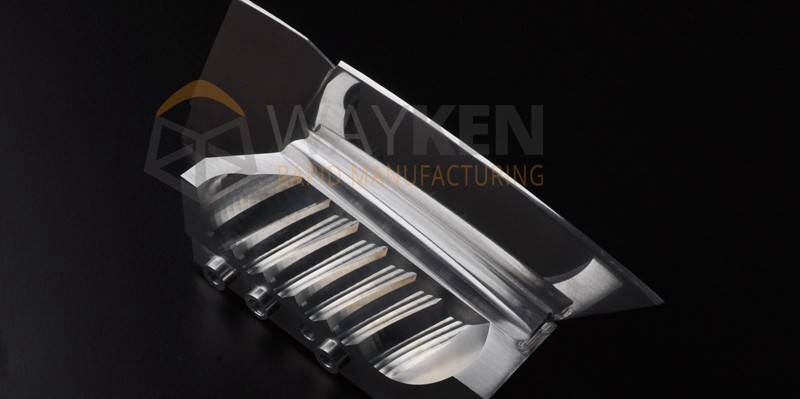
After carefully analyzing the CAD files sent by the customer, The first thing WayKen attention to is the optical surface in the design, which is the most important part of the design because it assumes the role of optical performance testing. The entire optical surface consists of many small optical surfaces, which are derived from the calculation of the corresponding surface equations. Meanwhile, these small optical surfaces are able to discretize the light source to achieve optical effects. So this was the key to the whole project.
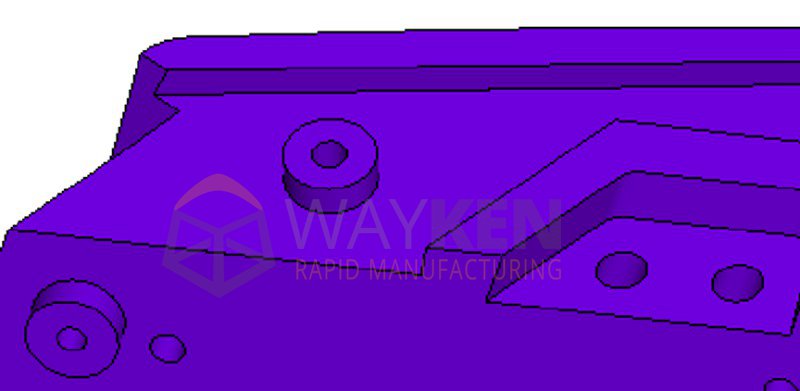
Another attracts our attention is the holes on the back side of the design. The reflector will be placed in the proper position of the headlight through these holes, for testing the reflection angle. As a result, during the machining process, we need to pay attention to the holes’ dimensions and the distance between them. Therefore, in addition to checking the tolerances, we need to carry out a trial assembly on the final parts.
How WayKen Starts Manufacturing Process Step by Step?
After checking the challenges and details of the project, WayKen is ready to produce this aluminum reflector. Here we will carry out the machining process in terms of material selection, machining solutions, post-processing, and test-fitting.
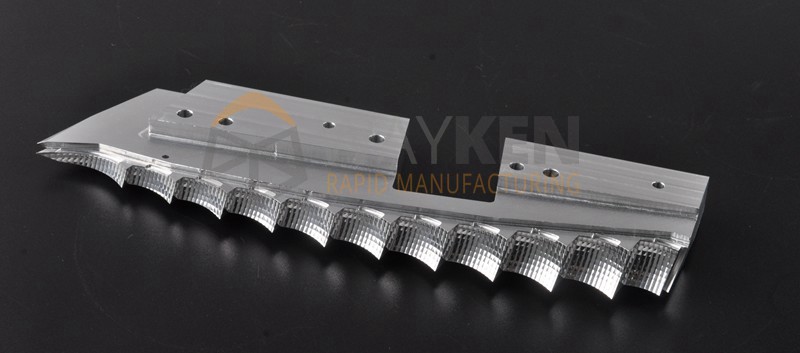
1. Determine the Final Material
There are a number of aluminum alloys commonly used in the prototyping of automotive lighting parts, such as Aluminium 2024, 5052, 6061, and 7075.
For the reflector in this project, which requires a mirror gloss surface, we advise choosing aerospace aluminum 7075 as the machining material, mainly based on these two considerations:
- (1) Machining micro-fine patterns with aluminum 7075, with less dimensional deformation;
- (2) Aluminum 7075 is more suitable for polishing and can achieve a mirror finish.
2. High Precision Machining Process
In this project, we use a 5-axis high-speed machine to process the reflector components. The high precision of the 5-axis machining process is better suited for micro-milling of optical micro-features. In order to achieve the best surface quality, the optical surfaces are machined by a multi-stage process of rough machining – medium rough machining – finish machining – and fine machining.
In addition, this process uses a ball-end cutter with a diameter of less than 5mm, and the final finish is done with a tool with a minimum radius of 0.15mm. Finally, the optical surface of the reflector part is milled to a radius close to the CAD model, while the entire process takes tens and hundreds of hours.
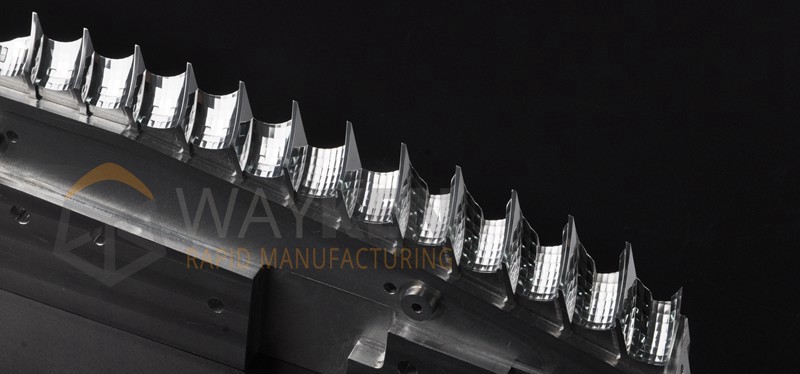
3. Fine Surface Finishing
As the customer will vacuum-metalize the reflector parts, WayKen was required to mirror polish the parts to a final surface roughness of Ra0.025-0.05um. Due to the complexity of the free-form structure of the part, it can only be polished by hand without loss of optical detail. So our manual polishing experts must complete the polishing process without touching the fine tooth structure.
After machining and polishing, we performed two 3D scans and roughness measurements on the optical surface. The result showed the surface roughness after CNC machining is completed is Ra0.2um and after hand polishing will be within Ra0.05um. The surface accuracy tolerance of all process scans is controlled within 0.05mm, which meets the customer’s requirements.
4. Ensure Trial Assembly
Since the reflector was disassembled and processed, and the best fit between the optical surface and the PCB mounting surface had to be evaluated, we performed a trial assembly for the customer to better meet the usage requirements before delivery.
Feedback
After receiving the aluminum reflectors and testing the assembly, the customer provided feedback that they were satisfied with the outcome of the product, and with WayKen’s professional service and strict quality control, he has more confidence in the next step of bringing the product to the market. This has made for a good working relationship!
If your project requires professional support and careful quality control, please feel free to contact WayKen for help. We are ready to turn your ideas into reality.


